Note: Descriptions are shown in the official language in which they were submitted.
CA 02583858 2007-04-04
AUTOMATED SIDEWALL ASSEMBLY MACHINE
BACKGROUND OF THE INVENTION
[001] The present invention relates to automatic fastening machines and
methods
thereof and, more specifically to an apparatus and method for automatic
assembly of major
subassemblies.
[002] Large transportation vehicles, such as highway trailers, aircraft, and
railroad cars
typically comprise multiple subassemblies that are fastened together. For
example, a highway
trailer includes a chassis, a roof, a floor, and a pair of sidewalls.
Generally, a trailer's sidewalls
are attached to both the floor and roof of the trailer. In the case of a sixty-
foot long highway
trailer, the load demands and sheer size of the sidewalls, roof, and floor
require that the sidewalls
be attached to both the roof and floor by rails that provide sufficient
structural support to
withstand such loads.
[003] To increase a trailer's structural integrity, it is preferable to attach
a sidewall to a
top and a bottom rail using multiple points of attachment for rivets or
screws. In the case of
sidewalls that have vertical support posts, extra support and points of
connection must be
provided to both securely fasten the sidewall, post, and rail together and to
ensure that the
increased localized weight and stress due to the vertical posts is adequately
supported. For
example, a sidewall may be connected to a rail by a single line of rivets
parallel to the
longitudinal axis of the sidewall and appropriately spaced to securely fasten
the sidewall and rail
together. However, multiple rivets may be required to securely fasten the
sidewall, sidewall rails
and sidewall post. Additionally, manufacturing tolerances and human error may
result in slight
variations in the spacing between sidewall posts on each individual trailer.
1
CA 02583858 2010-09-23
SUMMARY OF THE INVENTION
[004] The present invention recognizes and addresses considerations of prior
art
constructions and methods. In an embodiment of the present invention an
automated
punch and rivet machine for riveting a work piece at sequential work sites on
the work
piece, the machine comprising a frame for supporting the workpiece, the frame
having a
longitudinal axis, a carriage disposed proximate to the frame for movement
relative thereto
along the longitudinal axis, the carriage for transporting the work piece
relative to the
frame, at least one automated puncher fixed relative to said carriage
proximate the frame
and at least one automated masher fixed relative to the carriage proximate the
frame. A
first sensor is fixed relative to the frame so that when the carriage is
proximate to the first
sensor, the first sensor detects the workpiece. A drive is in communication
with the
carriage for moving the carriage with respect to the frame along the
longitudinal axis. A
control system in operative communication with the carriage, the at least one
automated
puncher, the at least one automated masher, the drive, and the first sensor
has a processor
operable in a first mode to move the carriage relative to the at least one
automated puncher
so that the at least one automated puncher can punch one or more holes in the
work piece
at a work site and the at least one automated masher can mash rivets located
in one or
more holes punched at another work site, and second mode following operation
of the at
least one automated puncher and the at least one automated masher, to move the
carriage
to a new work site of the sequential work sites responsively to the sensor so
that the at
least one puncher can punch one or more holes in the workpiece at the new work
site.
[004a] Accordingly, in one aspect of the present invention there is provided a
method for automatically fastening a sidewall to an upper or lower rail,
comprising:
a. providing the sidewall with a first post, said first post attached to an
underside of the sidewall, said first post having a first reference point and
a second
reference point spaced apart from the first reference point, the first
reference point and the
second reference point being detectable from a topside of the sidewall,
providing a
carriage movable relative to the longitudinal axis of the sidewall for moving
the sidewall,
and providing a machine including a hole puncher, a rivet masher, a first
sensor, a second
sensor, and a processor;
b. automatically detecting said first post using signals from said first
sensor
2
CA 02583858 2010-09-23
that are sent to said processor,
c. automatically obtaining style information about said sidewall adjacent to
said second sensor, via image data obtained from said second sensor,
d. providing information to the processor from said first sensor and then to
an
assembly program;
e. automatically punching at least one hole through the sidewall and the upper
or lower rail in response to said style information obtained by said second
sensor;
f. inserting a rivet in said at least one hole; and
g. automatically mashing said rivet in response to said information obtained
by said second sensor to secure the sidewall to the upper or lower rail.
[004b] According to another aspect of the present invention there is provided
a
method for automatically fastening a sidewall to at least one of an upper rail
or a lower
rail, the sidewall including at least one post, comprising:
a. moving the sidewall and the at least one rail along the longitudinal axis
of
the sidewall,
b. sensing the location of the at least one post and sensing the type of the
at
least one post, the type being selected from a plurality of different types of
posts, wherein
the type sensing includes using image data obtained from a vision sensor;
c. based upon the location of the at least one post and the sensed type,
automatically punching at least one hole through the sidewall and the at least
one rail;
d. inserting a fastener in the at least one hole; and
e. automatically securing the fastener to secure the sidewall to the at least
one
rail.
[004c] According to yet another aspect of the present invention there is
provided a
method for automatically fastening a sidewall to at least one of an upper rail
or a lower
rail, the sidewall including at least one post, comprising:
a. sensing a style of the sidewall, wherein sensing the style of the sidewall
includes taking a picture using a vision sensor;
b. based upon the sensed style, automatically selecting an assembly program
for automatically fastening the sidewall to the at least one rail;
c. moving the sidewall by indexed movements of a cart mechanism;
2a
CA 02583858 2010-09-23
d. sensing either a correct position or an incorrect position of the sidewall;
and
e. when the incorrect position is sensed in step (d), adjusting the indexed
movements by a first distance to move the sidewall to the correct position.
[004d] According to still yet another aspect of the present invention there is
provided a method for automatically fastening a sidewall to at least one of an
upper rail or
a lower rail, the sidewall including at least one post, comprising:
a. moving the sidewall and the at least one rail along the longitudinal axis
of
the sidewall;
b. sensing the location of the sidewall;
c. sensing the style of the sidewall including taking a picture of the
sidewall
using a vision sensor; and
d. determining a fastening pattern based at least in part on the style of the
sidewall.
[005] The accompanying drawings, which are incorporated in and constitute a
part of this specification, illustrate one or more embodiments of the
invention and,
together with the description, serve to explain the principles of the
invention.
2b
CA 02583858 2007-04-04
BRIEF DESCRIPTION OF THE DRAWINGS
[006] A full and enabling disclosure of the present invention, including the
best mode
thereof directed to one of ordinary skill in the art, is set forth in the
specification, which makes
reference to the appended drawings, in which:
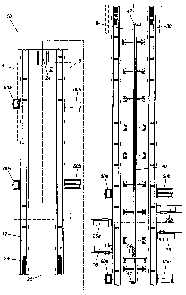
[007] Figure 1 is a plan view of an embodiment of the present invention;
[008] Figure 2 is a partial perspective view of the automated assembly machine
of
Figure 1;
[009] Figure 3 is a partial perspective view of a rail for use in the
automated assembly
machine of Figure 1;
[010] Figure 4A is a perspective view of a cart assembly and vision system for
use in
the automated assembly machine of Figure 1;
[Oil] Figure 4B is a partial perspective view of a frame assembly for use in
the
automated assembly machine of Figure 1;
[012] Figure 5 is a perspective view of the cart assembly and rail of Figures
3 and 4A;
[013] Figure 6 is a perspective view of a bottom rail punching press for use
in the
automated assembly machine of Figure 1;
[014] Figure 7 is a reverse perspective view of the bottom rail punching press
of Figure
6;
[015] Figure 8 is a perspective view of the punching area of the bottom rail
punching
press of Figure 6;
[016] Figure 9 is a perspective view of a gag assembly for use in the bottom
rail press of
Figure 6;
[017] Figure 10 is a perspective view of a punch assembly for use in the
bottom rail
press of Figure 6;
3
CA 02583858 2007-04-04
[018] Figure 11 is a perspective view of a top rail punching press for use in
the
automated assembly machine of Figure 1;
[019] Figure 12 is a reverse perspective view of the top rail punching press
of Figure
11;
[020] Figures 13 is a perspective view of the punching area of the top rail
punching
press of Figure 11;
[021] Figure 14 is a perspective view of a gag assembly for use in the top
rail punching
press of Figure 11;
[022] Figure 15 is a perspective view of a punch assembly for use in the top
rail
punching press of Figure 11;
[023] Figure 16 is a perspective view of a rivet crushing press for use in the
automated
assembly machine of Figure 1;
[024] Figure 17 is a reverse perspective view of the rivet crushing press of
Figure 16;
[025] Figure 18A and 18B are perspective views of the rivet crushing area of
the rivet
crushing press of Figure 16;
[026] Figure 19 is a perspective view of a gag assembly for use in the rivet
crushing
press of Figure 16;
[027] Figures 20 and 21 are perspective views of the cart of Figure 4A
operating on a
sidewall assembly of one embodiment of the present invention;
[028] Figures 22A and 22B are perspective views of a manual rail guide for use
in the
automated assembly machine of Figure 1;
[029] Figures 23A - 23C are perspective views of an automatic rail guide for
use in the
automated assembly machine of Figure 1;
4
a 6
CA 02583858 2007-04-04
[030] Figures 24A - 24F are perspective views of the cart of Figure 4A shown
in
operation on the rail of Figure 3;
[031] Figure 25A is a perspective view of the top rail punch assembly of
Figure 11;
[032] Figure 25B is a perspective view of the gag assembly of Figure 14 shown
in a
position corresponding to the top rail punch assembly of Figure 25A;
[033] Figure 26A is a perspective view of the top rail punch assembly of
Figure 11;
[034] Figure 26B is a perspective view of the gag assembly of Figure 14 shown
in a
position corresponding to the top rail punch assembly of Figure 26A;
[035] Figure 27A is a perspective view of the top rail punch assembly of
Figure 11;
[036] Figure 27B is a perspective view of the gag assembly of Figure 14 shown
in a
position corresponding to the top rail punch assembly of Figure 27A;
[037] Figure 27C is a perspective view of the top rail punch assembly of
Figure 11;
[038] Figure 27D is a perspective view of the gag assembly of Figure 14 as
shown in a
position corresponding to the top rail punch assembly of Figure 27C.
[039] Figure 28A is a perspective view of the rivet compressing area of the
riveting
press of Figure 16;
[040] Figure 28B is a perspective view of the rivet crushing area of Figure 16
shown in
a rivet crushing position; and
[041] Figure 28C is a section view of a rail anvil for use in the riveting
press of Figure
16.
[042] Repeat use of reference characters in the present specification and
drawings is
intended to represent same or analogous features or elements of the invention.
I u,.
CA 02583858 2007-04-04
DETAILED DESCRIPTION OF PREFERRED EMBODIMENTS
[043] Reference will now be made in detail to presently preferred embodiments
of the
invention, one or more examples of which are illustrated in the accompanying
drawings. Each
example is provided by way of explanation of the invention, not limitation of
the invention. In
fact, it will be apparent to those skilled in the art that modifications and
variations can be made
in the present invention without departing from the scope or spirit thereof.
For instance, features
illustrated or described as part of one embodiment may be used on another
embodiment to yield
a still further embodiment. Thus, it is intended that the present invention
covers such
modifications and variations as come within the scope of the appended claims
and their
equivalents.
[044] Figures 1 and 2 illustrate an automated sidewall assembly machine 10
that
receives a sidewall panel 2, a bottom rail 4, and a top rail 6, all shown in
phantom on Figure 1,
and automatically fastens all three components together. Assembly machine 10
includes a
machine frame 12, a center cart mechanism 14, a bottom rail punching press 16,
a top rail
punching press 18, a bottom rail riveting press 20a, a top rail riveting press
20b and an overhead
vision system 24.
[045] Frame 12 defines a central longitudinal axis 26 (Figure 1), a first end
28 where a
sidewall panel 2, a bottom rail 4 and a top rail 6 are loaded and a second end
30 where the
completed sidewall assembly 8 is removed once the bottom rail and top rail
have been securely
attached to the sidewall panel. Bottom rail punching press 16 is located on
the side of frame 12
that receives the sidewall bottom rail 4, and top rail punching press 18 is
located on the side of
frame 12 that receives sidewall top rail 6. In one embodiment, top rail
punching press 18 is
offset from bottom rail punching press 16 by four feet along machine central
longitudinal axis
26. Additionally, riveting presses 20a and 20b are each spaced eight feet
apart from a respective
punching press 16 and 18 along machine central longitudinal axis 26. As a
result, the punching
presses are offset from one another on axis by four feet. However, it should
be appreciated that
the top and bottom rail punching presses may be offset by more or less than
four feet, or may not
be offset at all, and that the spacing between riveting presses 20a and 20b
and their respective
punching presses may be varied as well.
6
I=I&
CA 02583858 2007-04-04
[046] Referring to Figure 2, a plurality of skates 32 extend along the entire
length of
frame 12 and are arranged into a first set 34 and a second set 35. Frame 12
supports both skate
first set 34, positioned adjacent to the bottom rail receiving side machine of
10, and skate second
set 35, positioned adjacent to the top rail receiving side of machine 10. Each
skate set comprises
three skates 32 arranged in parallel columns. In one embodiment, each skate 32
is approximately
feet long and is equipped with rollers 36, which are staggered along the
length of skates 32.
In this way, the skates provide rolling support for the sidewall assembly as
it progresses along
the length of automated sidewall assembly machine 10. As shown in Figure 4B,
machine frame
12 supports a plurality of skate lifters 29, comprising a skate cylinder 31
and two skate posts 33.
Skate lifters 29 support skates 32 and allows for the lifting or lowering of
skate 32, as described
more fully below.
[047] Referring again to Figures 2 and 3, frame 12 supports a center rail 40,
which
guides center cart mechanism 14 as it is indexed along the length of rail 40
by a drive belt 42. A
belt motor 44, located at the end of center rail 40, rotates an output shaft
(not shown) outfitted
with a drive pulley 46 that drives belt 42. A follower pulley 47 (Figure 1)
located at the end of
center rail 40 proximate to frame second end 30 (Figure 1) works in
conjunction with drive
pulley 46 to tension belt 42. Belt 42 may be fixed to center cart mechanism 14
by one or more
bolts, rivets, clamps or other suitable hardware. In one embodiment, drive
motor 44 is a servo
motor, but it should be understood that any suitable type of motor may be
used. Also, instead of
a belt system, center cart mechanism 14 may be indexed by other means such as
a ball screw
mechanism, a gear and chain system, a cable and pulley system, or a rack and
pinion system.
Rail 40 is equipped with an angle iron guide 48 that spans the length of
center rail 40 and allows
carriage mechanism brake calipers 50 and 52 (Figure 5) to securely lock
carriage mechanism 14
in place when not in motion.
[048] Referring again to Figure 1, sidewall rail alignment roller assemblies
are provided
along the sides of machine frame 12 to properly align the sidewall assembly
with the punching
and riveting presses. In one embodiment, four manually operated alignment
rollers assemblies
60a are spaced along the bottom rail side of frame 12, and four automatic
alignment roller
assemblies 60b are spaced along top rail side of frame 12. Referring to
Figures 22A and 22B,
each manual roller assembly 60a has an alignment roller 62a, a roller arm 63a,
and a support
frame 64a, which rotatably supports roller arm 63a by a pivot pin 65a. When
not in use, roller
7
1 1 W 1 Y
CA 02583858 2007-04-04
62a and roller arm 63a hang from pivot pin 65a so that roller arm 63a does not
impede the
loading of a sidewall assembly onto assembly machine skate 32. When a sidewall
assembly has
been loaded, an operator swings roller arm 63a up into alignment about pivot
pin 65a and inserts
a locking pin 67a into aligned receiving holes (not shown) in roller arm 63a
and frame 64a, as
shown in Figure 22B.
[049] Referring to Figures 23A - 23C, each automatic roller assembly 60b has a
roller
62b, a roller arm 63b, a frame 64b, a pneumatic rotating cylinder 66b, a
pneumatic linear
cylinder 68b and a rail sensor 69b. As previously mentioned, in a preferred
embodiment, the
automated assembly machine has four manual roller assemblies and four
automatic roller
assemblies. However, it should be appreciated that any appropriate number of
alignment rollers
may be employed to keep the wall assembly square with the punching and
riveting presses
during the assembly process.
[050] Turning to Figures 4A and 5, center carriage mechanism 14 is illustrated
in a
sidewall gripping position. Carriage mechanism 14 includes two carts: a first
cart 70 for
attaching to and pulling the sidewall assembly, and a second cart 72 attached
to drive belt 42
(Figure 3) that indexes the entire mechanism 14 along center rail 40. Second
cart 72 has a belt
bracket 71 (Figure 4A) that supports a belt clamp (not shown) for fixing drive
belt 42 to second
cart 72. Thus, as drive motor 44 (Figure 3) indexes the drive belt, the second
cart moves. It
should, however, be understood that any alternative method of fixing the drive
belt to the second
cart is contemplated within the scope of the invention.
[051] First cart 70 supports a jaw assembly 74 equipped with a pair of gripper
jaws 76
that releasably engage sidewall panel 2. Gripper jaws 76 are supported by jaw
assembly support
member 78, which is connected to first cart 70 by a cylinder piston rod 80 and
two guiding posts
82 (Figure 5). Thus, when a pneumatic cylinder 84 actuates, piston rod 80
retracts pulling jaw
assembly 74 down proximate to center rail 40. In this way, jaw assembly 74 may
be lowered
beneath the sidewall assembly to facilitate removal of the sidewall at the
completion of the
riveting process.
[052] Referring in particular to Figure 4A, gripper jaws 76 are depicted in a
closed
position that allows center cart mechanism 14 to pull the sidewall assembly as
it indexes along
the length of rail 40 (Figure 2). Jaws 76 are normally in an open position to
allow sidewall panel
8
I 1111M
CA 02583858 2007-04-04
2 to be inserted into the jaws. A toggle switch 86 is mounted onto jaw
assembly support member
78 and senses when the sidewall panel has been inserted into the jaws. That
is, the position of
toggle switch 86 corresponds to whether sidewall panel 2 is in position for
gripping by the jaws
76, and therefore the switch sends a signal to a programmable logic control
(PLC, not shown).
The PLC controls the pneumatic cylinders (not shown) that actuate jaws 76
between a normally
open position and a closed gripping position. Jaws 76 are equipped with rubber
upper grippers
90 and serrated metal lower grippers 92 to securely hold the sidewall panel
during operation. It
should be appreciated that the upper and lower grippers may be formed from any
other material
suitable for securely gripping the sidewall, such as urethane, silicone,
alloy, etc.
[053] Referring to Figure 5, first cart 70 is equipped with a brake caliper 50
that locks
onto the horizontal flange 48a of angle iron guide 48. When first cart caliper
50 is locked onto
guide flange 48a, it holds first cart 70 securely in place and resists motion
along machine
longitudinal axis 26 (Figure 1). Second cart 72 supports a horizontally-
mounted pneumatic
cylinder 94 that is connected to a first cart 70 by a piston rod 96. Cylinder
piston rod 96 pulls
first cart 70 towards second cart 72 after each indexing move performed by
second cart 72.
Second cart 72 is also equipped with a brake caliper 52 that locks onto
horizontal flange 48a. As
a result, when second cart caliper 52 locks onto guide 48, caliper 52 holds
second cart 72
securely in place while cylinder 94 actuates to retract piston rod 96 and
pulls first cart 70 towards
second cart 72, as described in detail below.
[054] Second cart 72 is equipped with a shock absorber 93 that engages with a
corresponding bolt 95 mounted on the first cart. When cylinder 94 retracts
piston rod 96 far
enough for bolt 95 to contact shock absorber 93, the shock absorber retards
further motion of
first cart 70 towards second cart 72 and prevents the carts from crashing into
each other. A
proximity switch 98 on the end of second cart 72 senses a proximity switch
flag 100 attached to
first cart 70. In a preferred embodiment, flag 100 is a bolt, but it should be
understood that a cap
screw, bracket or any similar hardware made of a ferrous material may be used.
Thus, when
proximity switch 98 senses flag 100, a signal is relayed to a PLC (not shown)
to discontinue the
actuation of pneumatic cylinder 94 and first cart 70 comes to a stop. In this
manner, shock
absorber 93 slows the progress of first cart 70 until proximity switch 98
senses flag 100, at which
time a signal is sent to the PLC to stop the actuation of cylinder 94.
9
CA 02583858 2007-04-04
[055] Referring to Figures 6 and 7, bottom rail punching press 16 is shown
having a C-
shaped body 200 with an upper portion 202, a lower portion 204, a vertical
portion 206, and a
punching area generally denoted by 208 (Figure 6). Bottom rail punching press
16 is also
equipped with a lift cylinder 210, a punch cylinder 212, bottom gag proximity
switches generally
denoted by 214, a bottom die 216, a top die assembly 218, a separating mat
220, a top die upper
proximity switch 223, a top die lower proximity switch 222, and safety
guarding 203 (Figure 7).
Lift cylinder 210 is positioned between a lift cylinder anchor bracket 224 and
a lift cylinder body
bracket 225. Four lift guide posts 209, mounted to anchor bracket 224, are
received by four
respective bushings 211, coupled to body bracket 225, to provide alignment and
support between
the anchor bracket and the body bracket. Bushings 211 slide along posts 209 as
lift cylinder 210
actuates to raise and lower C-shaped body 200 relative to machine frame 12
(Figure 2).
[056] Referring to Figures 8 and 9, bottom die 216 connects to punch body
lower
portion 204 (Figure 8) by a bottom die shoe 226 that rigidly supports two die
posts 228 (Figures
6 and 7), a lower rail punch spacer 230, a pair of gag guides 232 and a pair
of gags 234 and 235.
Referring to Figure 8, bottom die shoe 226 also supports two front proximity
switch brackets
215a and two rear proximity switch brackets 215b. Each front proximity switch
bracket 215a
supports a front proximity switch 214a, while each rear proximity switch
bracket 215b supports
both an intermediate proximity switch 214b and a rear proximity switch 214c.
The operation of
the proximity switches 214a, 214b, and 214c will be described in detail below.
[057] Referring to Figure 9, gags 234 and 235 are positioned parallel to each
other and
are slidably received by gag guides 232. Each gag 234 and 235 defines a
respective (1) sloped
leading edge 234a and 235a, (2) first stage surface 234b and 235b, (3) second
stage surface 234c
and 235c, and (4) sloped transition surface 234d and 235d intermediate the
first and second stage
surfaces. Gag 234 slides into gag guides 232 when cylinders 276 and/or 282
actuate, while gag
235 slides into gag guides 232 when cylinders 277 and/or 283 actuate. Gag
cylinders 276, 277,
282, and 283 are situated in a gag cylinder bank 269 in a stacked arrangement
that is rigidly
supported by a gag cylinder bank bracket 271. Gag cylinder bank bracket 271
attaches to both
C-shaped body vertical portion 206 (Figures 6 and 7) and to bottom die shoe
226 (shown in
phantom in Figure 9). Bracket 271 defines two guideways 272 that slidably
receive two cylinder
sliders 274 and 275. Lower gag cylinders 282 and 283 connect to a rear
cylinder support 278
and to sliders 274 and 275, respectively. Thus, gag cylinders 276 and 277 can
actuate to move
CA 02583858 2007-04-04
gags 234 and 235, respectively, into gag guides 232 a predefined distance,
after which lower gag
cylinders 282 and 283 can actuate to extend piston rods 279 and 280 forward.
This additional
movement in turns extends gags 234 and 235, respectively, into gag guides 232
an additional
predetermined distance for punching field holes.
[058] Punch spacers 230 and gag guides 232 support bottom die 216, which
defines six
slots arranged into a first set 238 of three slots and a second set 240 of
three slots. All slots in a
single set are parallel to each other, and the slots are arranged so that each
slot in one set is
aligned with and parallel to a respective slot of the second set. Each slot
extends inwardly from
one of two opposite outer sides of bottom die 216 toward the bottom die's
center, and each slot
slopes downwardly from the die's center to a slot open end. First slots 238 do
not communicate
with second slots 240, but rather terminate to define inner ends 242.
[059] Bottom die 216 also slidably receives two rail punches 244, which are
positioned
perpendicular to the longitudinal axes of the slots and proximate to slot
inner ends 242. Each rail
punch 244 supports three die buttons 246 having a central bore 245 in
communication with a
respective exit portal 245a (Figures 26A and 26B). Thus, the material punched
out of the
sidewall panel assembly during the punching process exits the punch through
die button central
bore 245 out of exit portal 245a and out one of the two slot sets 238 and 240.
In this way, the
refuse material slides out of the bottom of die press 216, which prevents the
machine from
becoming jammed.
[060] Referring to Figure 10, top die assembly 218 comprises a bottom rail
punch
retainer 252, six punches 254, two field gags 256a and 256b and two post gags
258a and 258b.
Bottom rail punch retainer 252 may be secured to top die shoe 248 by screws,
bolts, or any other
suitable fastener and defines six gag slots 260, each of which slidably
receives a field or post
gag, Gag cylinders 262a and 262b drive field gags 256a and 256b into their
respective slots
while cylinders 262c and 262d drive post gags 258a and 258b into their
respective slots. In one
embodiment, the gag cylinders may be pneumatic cylinders powered by air hoses
255 (Figure 6)
connected to air valves 236.
[0611 Gag slots 260 are arranged in two sets of three parallel slots, and an
inner end of
each gag slot defines a vertical, counterbored through-hole 264 that slidably
receives a respective
punch 254. Punches 254 each have a flange 266, a shank 268, and a tip 270.
Each through-hole
11
CA 02583858 2007-04-04
264 slidably receives a punch shank 268 so that punch flange 266 rests in the
counterbore (not
shown) of through-hole 264. Field gags 256a and 265b and post gags 258a and
258b are slidably
positioned in the gag slots so that when gag cylinders 262a -- 262d actuate,
the gags are biased
into the gag slots and restrain punch flanges 266 to prevent the punches from
sliding upward in
through-holes 264 when punch tips 270 contact the sidewall assembly.
[062] Four proximity switches 257a and 257b (shown in phantom) are attached by
respective brackets (not shown) to top die shoe 248 and sense the rear portion
of gags 256a,
256b, 258a and 258b, respectively, when the gags are retracted from their
respective slots. Once
gag cylinders 262a - 262d bias the gags into their corresponding gag slots
260, proximity
switches 257a and/or 257b no longer sense the rear portion of the gags, and
the proximity
switches send a signal to a PLC (not shown) indicating that the gags are in a
punching position.
Punch cylinder 212 (Figure 8) may actuate causing top die assembly 218 to
slide downward, into
a hole-punching stroke.
[063] Field gags 256a and 256b are single gags that restrain only one punch
each, but
post gags 258a and 258b are U-shaped and, therefore, simultaneously restrain
two punches each.
In this configuration, post gag 258a restrains post punches 254c, while post
gag 258b restrains
post punches 254d. This arrangement provides an added advantage of requiring
only two post
gag cylinders 262 for four punches. It should be understood though that any
number of
alternative arrangements, including six gags with corresponding cylinders, may
be used to
restrain the punches in accordance with the present invention.
[064] Referring again to Figures 6 and 7, bottom rail top die assembly 218
attaches to
punching press upper portion 202 by punch cylinder 212. Top die assembly 218
is rigidly
attached to a piston rod 213 (Figure 6) of cylinder 212 by top die shoe 248.
Top die shoe 248 is
equipped with two bushings 250 that ride about die posts 228. Consequently, as
piston rod 213
extends, top die assembly 218 lowers towards bottom die 216 along die posts
228.
[065] Punch cylinder 212 is a hydraulic cylinder that actuates to either push
piston rod
213 vertically downward or pull piston rod 213 vertically upward. During
punching, hydraulic
oil is forced into an upper chamber (not shown) of punch cylinder 212, and the
pressure exerted
upon piston rod 213 by the hydraulic oil forces the piston rod downward until
the piston rod is
fully extended. When the piston rod fully extends, top die assembly 218 lowers
toward bottom
12
I I II III
CA 02583858 2007-04-04
die assembly 216, and punches 254 (Figure 10) restrained by their respective
gags punch holes in
the sidewal[l assembly. Once the holes are punched in the sidewall assembly,
hydraulic oil is
forced out of the upper chamber (not shown) and into a lower chamber (not
shown) of cylinder
212. The pressure exerted upon the piston rod by the hydraulic oil forces
piston rod 213 to
retract and raise top die shoe 248 vertically upward towards punching press
upper portion 202.
[066] Referring to Figures 11 - 12, a top rail punching press 18 utilizes many
identical
or similar components as bottom rail punching press 16 and function in a
nearly identical
manner. However, a complete description of a preferred embodiment of the top
rail punching
press is provided herein. Top rail punching press 18 has a C-shaped body 300
with an upper
portion 302, a lower portion 304, a vertical portion 306, and a punching area
308. The top rail
punching press is also equipped with a lift cylinder 310, a punch cylinder
312, gag proximity
switches generally denoted by 314, a bottom die 316, a top die assembly 318, a
separating mat
320, a top die upper proximity switch 322, a top die lower proximity switch
323, and safety
guarding 303 (Figure 11). Lift cylinder 310 is positioned between a lift
cylinder anchor bracket
324 and a lift cylinder body bracket 325. Four lift guide posts 309, mounted
to anchor bracket
324, are received by four respective bushings 311, coupled to body bracket
325, to provide
alignment and support between the anchor bracket and the body bracket.
Bushings 311 slide
along posts 309 as lift cylinder 310 actuates to raise and lower C-shaped body
300 relative to
machine frame 12 (Figure 2).
[067] Referring particularly to Figure 11, lift cylinder bracket 324 is
slidably attached to
two rails 317 and is moveable along the rails by a ball nut (not shown) driven
by a drive screw
319 that is rotatably attached to a drive motor 321. When motor 321 rotates
drive screw 319, the
ball nut (riot shown) advances along the drive screw thereby moving top rail
punch press 18
linearly transverse to machine longitudinal axis 26 (Figure 1). This allows
for the adjustment of
the position of punching press 18 with respect to machine central longitudinal
axis 26 (Figure 1).
A front proximity switch 307a and a rear proximity switch 307b are affixed to
lift cylinder
bracket 324 to accurately position punch press 18. When drive screw 319 has
advanced punch
press 18 to a punching position proximate to the machine longitudinal axis,
front proximity
switch 307a senses a flag (not shown) and drive screw drive motor 321 stops
rotating drive shaft
319. In this way, punch press 18 is properly positioned for punching. Once the
last holes have
been punched in the sidewall assembly, drive motor 321 rotates drive shaft 319
in an opposite
13
CA 02583858 2007-04-04
direction, and punch press 18 is advanced to a home position distal from the
machine
longitudinal axis. When punch press 18 reaches its home position, rear
proximity sensor 307b
senses a flag (not shown) and the drive screw motor stops rotating the drive
shaft.
[068] Referring to Figures 13 and 14, bottom die 316 is connected to punch
body lower
portion 304 by a bottom die shoe 326 that also rigidly supports two die posts
328 (Figure 13), a
lower rail punch spacer 330, a pair of gag guides 332 and a pair of gags 334
and 335. As with
bottom rail punch press 16, top rail punch press gags 334 and 335 are
positioned parallel to each
other and are slidably received by gag guides 332 (Figure 14). Bottom die shoe
326 also
supports two front proximity switch brackets 315a and two rear proximity
switch brackets 315b
(Figure 13). Each front proximity switch bracket 315a supports a front
proximity switch 314a,
while each rear proximity switch bracket 315b supports both an intermediate
proximity switch
314b and a rear proximity switch 314c. The operation of the proximity switches
314a, 314b and
314c will be described in detail below.
[069] Referring to Figure 14, each gag 334 and 335 defines a respective (1)
sloped
leading edge 334a and 335a, (2) first stage surface 334b and 335b, (3) second
stage surface 334c
and 335c and (4) sloped transition surface 334d and 335d intermediate the
first and second stage
surfaces. Gag 334 slides into gag guides 332 when cylinders 376 and/or 382
actuate, and gag
335 slides into gag guides 332 when cylinders 377 and/or 383 actuate. Gag
cylinders 376, 377,
382, and 383 are situated in a gag cylinder bank 369 in a stacked arrangement
that is rigidly
supported by gag bank bracket 371. Gag cylinder bank bracket 371 attaches to C-
shaped body
vertical portion 306 (Figures 11 and 12) and bottom die shoe 326 (shown in
phantom in Figure
14).
[070] Bottom die 316 defines four slots arranged into a first set 338 of two
slots and a
second set 340 of two slots. All slots in a single set are parallel to each
other, and the slots of
first set 338 are arranged so that each slot is aligned with and parallel to a
respective slot of
second set 340. Each slot extends inwardly from one of two opposite outer
sides of bottom die
316 toward the bottom die's center. The slots of first set 338 do not
communicate with the slots
of second set 340, but rather terminate to define inner ends 342 and each slot
slopes downwardly
from the die's center to a slot open end.
14
CA 02583858 2007-04-04
[071] Bottom die 316 slidably receives two rail punches 344, which are
positioned
perpendicular to the axis of the slots and proximate to slot inner ends 342.
Each rail punch 344
supports two die buttons 346 having a central bore 345 in communication with a
respective exit
portal (not shown). Thus, the material punched out of the sidewall panel
assembly during the
punching process exits through die button central bore 345 out of the exit
portals (not shown)
and out one of the two slot sets 338 and 340. In this way, the refuse material
slides out of the
bottom of die press 316, which prevents the machine from becoming jammed.
[072] Referring to Figure 15, top die assembly 318 comprises a bottom rail
punch
retainer 352, four punches 354, two field gags 356a and 356b, and two post
gags 358a and 358b.
Top rail punch retainer 352 may be secured to top die shoe 348 by screws,
bolts, or any other
suitable fasteners and defines four gag slots 360, each of which slidably
receives a respective
field or post gag. Gag cylinders 362a and 363b drive field gags 356a and 356b,
respectively,
while gag cylinders 362c and 362d drive post gags post gags 358a and 358b,
respectively. The
field gags and post gags are identical single gags that restrain only one
punch each. The gag
cylinders may be pneumatic cylinders powered by air hoses 355 (Figure 12)
connected to air
valves 336. Once the gag cylinders bias the gags into their corresponding gag
slots 360, the
proximity switches no longer sense the rear portion of the gags, and the
switches send a signal to
a PLC (not shown) indicating that the appropriate gags are in a punching
position. Punch
cylinder 312 (Figure 11) may actuate causing top die assembly 318 to slide
downward, into a
hole-punching stroke.
[073] Gag slots 360 are arranged in two sets of two parallel slots, and an
inner end of
each slot defines a vertical, counterbored through-hole (not shown) that
slidably receives a punch
354. Each punch 354 has a flange 366, a shank 368, and a tip 370. Punch shank
368 slides
through the through-hole (not shown), and the punch flange 366 rests in a
counterbore (not
shown) of the through-hole. Field gags 356a and 356b and post gags 358a and
358b are slidably
positioned in the gag slots so that when their respective gag cylinders are
actuated, the gags
restrain punch flanges 366 to prevent the punches from sliding upward in their
through-holes
when punch tips 370 contact the sidewall assembly. Field gags 356a and 356b
restrain field
punches 354a and 354b, respectively, while post gags 358a and 358b restrain
field punches 354c
and 354d, respectively. Four proximity switches 357a and 357b (shown in
phantom) are
w
CA 02583858 2007-04-04
attached by respective brackets (Figure 13) to top die shoe 348 and sense the
rear portion of gags
356 and 358, respectively, when the gags are retracted from their respective
slots 360.
[0741 Top rail top die assembly 318 is attached to punching press upper
portion 302 by
punch cylinder 312, as shown in Figures 11 and 12. When activated, punch
cylinder 312 lowers
top die assembly 318 into a punching position, as described in detail below.
Top die assembly
318 is rigidly attached to a piston rod 313 (Figure 13) of punch cylinder 312
by top die shoe 348,
which is equipped with two bushings 350 that ride along die posts 328 as
cylinder 312 lowers the
top die assembly.
[0751 Punch cylinder 312 is a hydraulic cylinder that actuates to either push
piston rod
313 vertically downward or pull piston rod 313 vertically upward. During
punching, hydraulic
oil is forced into an upper chamber (not shown) of punch cylinder 312, and the
pressure exerted
upon piston rod 313 by the hydraulic oil forces the piston rod downward until
the piston rod is
fully extended. When the piston rod fully extends, top die assembly 318 lowers
toward bottom
die assembly 316, and the punches 354a -- 354d (Figure 15) restrained by their
respective gags
punch holes in the sidewall assembly. Once the holes are punched in the
sidewall assembly,
hydraulic oil is forced out of the upper chamber (not shown) and into a lower
chamber (not
shown) of cylinder 312f forcing piston rod 313 to retract and raise top die
shoe 348 vertically
upward towards punching press upper portion 302.
[0761 Referring now to Figures 16 and 17, a top rail riveting press 20b has a
C-shaped
body 400, with an upper portion 402, a lower portion 404, a vertical portion
406 and a riveting
area generally denoted 408. Top rail riveting press 20b is also equipped with
a lift cylinder 410,
a riveting cylinder 412, bottom gag proximity switches generally denoted by
414, a bottom
riveting die 416, a top riveting die assembly 418, a top riveting die upper
proximity switch 422,
and a top riveting die lower proximity switch 423.
[0771 Riveting press lift cylinder 410 is positioned between a lift cylinder
anchor
bracket 424 and a lift cylinder body bracket 425. Four lift guide posts 409
are slidably received
in respective bushings 411 that are coupled to body bracket 425. The sliding
connection between
the guide posts and the bushings provides alignment and support between anchor
bracket 424
and body bracket 425 as lift cylinder 410 actuates to raise and lower C-shaped
body 400 relative
to frame 12 (Figure 1).
16
x w
CA 02583858 2007-04-04
[078] Referring particularly to Figure 16, riveting press 20b, located on the
top rail side
of assembly machine 10 (Figures 1 and 2), has two rails 417 that are slidably
attached to lift
cylinder bracket 424. A ball nut (not shown), attached to the bottom of
bracket 424, is driven by
a drive screw 419 that is rotatably attached to drive motor 421. When motor
421 rotates drive
screw 419., the ball nut (not shown) advances along the drive screw thereby
moving riveting
press 20b linearly transverse to machine longitudinal axis 26 (Figure 1). A
front proximity
switch 407a and a rear proximity switch 407b are affixed to lift cylinder
bracket 424 to
accurately position riveting press 20b. When drive screw 419 has advanced
riveting press 20 to
a riveting position proximate to the machine longitudinal axis, front
proximity switch 407a
senses a flag (not shown) and drive screw drive motor 421 stops rotating drive
shaft 419. In this
way, riveting press 20b is properly positioned for compressing rivets (not
shown). Once the last
rivets have been compressed, drive motor 421 rotates drive shaft 419 in an
opposite direction,
and riveting press 20b is returned to a home position distal from the machine
longitudinal axis.
When riveting press 20b reaches its home position, rear proximity sensor 407b
senses a flag (not
shown) and the drive screw motor stops rotating the drive shaft. This allows
for the adjustment
of the position of press 20b facilitating easy loading and unloading of a
sidewall assembly from
the assembly machine. However, rail riveting press 20a, located on the bottom
rail side of
machine 10 (Figure 1), is not equipped with a ball screw mechanism and,
accordingly, can not be
adjusted linearly transverse to machine longitudinal axis 26. It should be
understood, however,
that the bottom rail rivet press 20a may be formed similar to the top rail
rivet press so that it too
can be adjusted relative machine centerline 26.
[079] The following paragraphs address features of presses 20a and 20b that
are
identical; therefore any reference to features specific to press 20a or 20b
will be particularly
pointed out. Referring to Figures 18A, 18B and 19, bottom die 416 is rigidly
connected to
riveting press body lower portion 404 (Figure 18A) by a bottom die shoe 426.
Bottom die shoe
426 supports two die posts 428 (Figures 18A and 18B), a lower die spacer 430,
a pair of gag
guides 432 and a pair of gags 434 and 435 (Figures 18A and 19). Bottom die
shoe 426 also
supports two front proximity switch brackets 415a and two rear proximity
switch brackets 415b
(Figures 18A and 18B). Each front proximity switch bracket 415a supports a
front proximity
switch 414a, while each rear proximity switch bracket 415b supports both an
intermediate
proximity switch 414b and a rear proximity switch 414c.
17
I 1Y
CA 02583858 2007-04-04
[0801 Referring in particular to Figure 19, each gag 434 and 435 defines a
respective (1)
sloped leading edge 434a and 435a, (2) first stage surface 434b and 435b, (3)
second stage
surface 434c and 434c and (4) sloped transition surface 434d and 435d
intermediate the first and
second stage surfaces. Gags 434 and 435 are positioned parallel to each other
and are slidably
received by gag guides 432. Gags 434 slides into gag guides 432 when cylinders
476 and/or 482
actuate, while gag 435 slides in to gag guides 432 when cylinders 477 and/or
483 actuate as
described below. Gag cylinders 476, 477, 482, and 483 are situated in a gag
cylinder bank 469
in a stacked arrangement that is rigidly supported by a gag bank bracket 471.
Gag bank bracket
471 is attached to both C-shaped body vertical portion 406 (Figures 16 and 17)
and bottom die
shoe 426 (shown in phantom in Figure 19).
[0811 Bottom die 416, lower die spacer 430, and gag guides 432 support bottom
die 416
and bottom die 416 slidably receives two rail anvils 436 that are aligned
parallel to each other
and to gags 434 and 435, and each rail anvil supports three plungers 438.
Referring to Figure
28C, plungers 438 are spring-loaded and biased upward within rail anvil 436.
Rail anvils 436
define a vertical portion 436a and a horizontal flange 436b. During assembly
of rail anvils 436,
three through holes 436c are bored into vertical portion 436a. Through holes
436c define an
upper counterbore 436d that receives plunger 438 and a spring 439, and a lower
counterbore
436e that receives the head of a cap screw 437. It should be under stood that
cap screw 437 may
be replaced by a shoulder bolt or other appropriately shaped fastener.
[0821 Each upper counterbore 436d receives spring 439 and plunger 438, and the
spring
biases the plunger upward. Cap screw 437 is inserted into lower counterbore
436e so that the
treaded portion of the cap screw extends into through hole 436c and into upper
counterbore
436d. Each plunger is tapped to receive the threads of cap screw 437, and the
threaded portion
of cap screw 437 is tightened into the tapped portion of plunger 438. Rail
anvil flange 436b is
then attached to rail anvil vertical portion 436a sealing the head of cap
screw 437 into lower
counter bore 436e. Rail punch vertical portion 436a and rail punch flange 436b
may be attached
together by screws, weldments or by any other suitable assembly method. In
this configuration,
a downward force exerted on plunger 438 will compress spring 439 and allow
plunger 436 to
slide downward in counterbore 436d proximate to through hole 436c.
18
I I I .I I1Y
CA 02583858 2007-04-04
[083] Referring again to Figures 18A and 18B, riveting press top die assembly
418
comprises a top die shoe 440 rigidly attached to a piston rod 413 (Figure 18A)
of cylinder 412.
Top die shoe 440 rigidly supports anvil mount 444 (Figure 18B) and top anvils
446, which are
positioned so that each top anvil 446 aligns with one of rail anvils 436. Top
die shoe 440 is
equipped with two bushings 442 that ride along die posts 428 as cylinder 412
raises and lowers
top die assembly 418.
[084] In one embodiment, riveting cylinder 412 is a hydraulic cylinder that
actuates to
either push piston rod 413 vertically downward or pull piston rod 413
vertically upward. During
riveting, hydraulic oil is forced into an upper chamber (not shown) of
cylinder 412 forcing the
piston rod downward until the piston rod is fully extended. When the piston
rod fully extends,
the rivets (not shown) previously inserted into holes punched into the
sidewall assembly by top
rail punching press 18 are compressed between rail anvil 436 and top die anvil
446, securely
fastening top rail 6 to sidewall panel 2. Once the rivets are compressed,
hydraulic oil is forced
out of the upper chamber (not shown) and into a lower chamber (not shown) of
cylinder 412,
which forces piston rod 413 upward and raises top die shoe 440 vertically
upward towards
punching press upper portion 402. It should be understood that the riveting
process used for both
the bottom rail and top rail portions of an assembled sidewall are
substantially identical with the
exception that the top rail riveting press has smaller anvils and is equipped
with a mechanism for
varying the distance between the top rail riveting press and the machine frame
centerline 26
(Figure 1). Because of the minor differences between the top rail and bottom
rail rivet presses, a
detailed description of the bottom rail rivet press is not discussed herein.
[085] In operation, the automated sidewall assembly machine attaches a bottom
rail and
a top rail to a sidewall panel. In general, the assembly machine punches holes
in both the
sidewall and the top and bottom rails. Once the holes have been punched, an
operator inserts
rivet blanks into the punched holes, and the automated assembly machine
compresses the rivets,
thereby securely fastening the bottom and top rails to the sidewall panel. The
assembly machine
indexes the sidewall and rails along the length of the machine so that the
punching and riveting
presses may remain stationary with respect to the translating sidewall
assembly. The punching
and riveting process is repeated until the rails have been securely attached
to the sidewall panel
along the entire length of the sidewall assembly.
19
I I I 1 IA
CA 02583858 2007-04-04
[086] Referring to Figures 1 - 3, prior to executing the automated assembly
process,
machine 10 powers up and executes a homing operation in which center cart
mechanism 14
moves along center rail 40 to a position proximate to drive motor 44. Once
center cart
mechanism 14 reaches its home position, gripper jaws 76 (Figure 20) open and
the jaws are
ready to receive a sidewall assembly. Operators place a sidewall panel 2 onto
skates 32 at
machine frame first end 28 and position bottom rail 4 and top rail 6 along the
appropriate edges
of sidewall panel 2.
[087] Once the panel and rails are positioned on machine 10, an operator
swings manual
alignment rollers assemblies 60a (Figures 22A and 22B) into position by
rotating roller arms 63a
into a vertical attitude and inserts locking pin 67a into both roller arm 63a
and support frame 64a.
The operators then slide wall panel 2 and bottom rail 4 into contact with
manual alignment
rollers 62a. This properly aligns sidewall panel 2 and bottom rail 4 with
respect to bottom rail
punch press 16 and bottom rail riveting press 20a. After aligning the bottom
rail with manual
alignment rollers 62a, the operators actuate automated alignment roller
assemblies 60b to
properly secure the wall assembly in machine 10.
[088] Referring to figures 23A - 23C, pneumatic rotating cylinder 66b
retracts, rotating
roller arm 63b from a horizontal attitude (Figure 23A) into a vertical
attitude (Figures 23B and
23C), and pneumatic linear cylinder 68b actuates pulling roller 62b and roller
arm 63b towards
top rail 6 (Figure 23C) until rail sensor 69b makes contact with the edge of
the top rail. Once rail
sensor 69b makes contact with the top rail, cylinder 68b stops actuating, and
a rolling connection
between top rail 6 and roller 62b is maintained until the sidewall assembly is
indexed beyond the
automated alignment roller 60b.
[089] Multiple manual and automatic alignment roller assemblies 60a and 60b
(Figure
1) are provided along the length of assembly machine 10, thus ensuring proper
alignment of the
sidewall assembly throughout the assembly process. When the sidewall assembly
progresses
past each automated alignment roller assembly 60b, sensor 69b recognizes that
roller 62b is no
longer in contact with the top rail (not shown) and actuates linear cylinder
68b, pulling roller 62b
and roller arm 63b towards cylinder 68b. Rotation cylinder 66b then actuates,
rotating roller 62b
into a horizontal attitude, where it remains until a new sidewall assembly is
loaded for assembly.
IY,
CA 02583858 2007-04-04
[090] Referring to Figures 20 and 21, once the sidewall assembly is secured
between the
alignment rollers, the operators roll the assembly towards center cart
mechanism 14, until the
leading edge of sidewall 2 trips toggle switch 86. This causes the jaw
cylinders (not shown) to
actuate so that gripper jaws 76 close and tightly clamp down onto sidewall 2
(Figure 21).
Once the jaws grip the sidewall assembly, brake calipers 50 and 52 disengage
from angle iron
guide flange 48a (Figure 5), and drive motor 44 (Figure 3) slowly advances
drive belt 42 moving
cart 14 along rail 40 until a proximity sensor 87 (Figure 21) attached to
skate 32 detects the
leading edge of the first support post 3 attached to the underside of sidewall
panel 2. Once
proximity sensor 87 senses the forward edge of first post 3, vision system 24
is positioned so that
a camera 25 may take a picture of the forward edge of the sidewall assembly in
order to
determine which style of sidewall is being assembled and where the post is
located.
[091] Referring to Figure 21, vision system 24 is fixedly attached to an
overhead frame
(not shown) located above assembly machine frame 12 and the sidewall assembly.
When
camera 25 takes a picture of the sidewall assembly, the image is relayed back
to a CPU, which
digitally processes the picture and looks for one of the following five items:
[092] (1) a post;
(2) a post with rivets spaced 4" apart directly below the camera;
(3) a post with rivets spaced 4" apart and offset 2" from the center of the
camera;
(4) a post with rivets spaced 6" apart; or
(5) a post with rivets spaced 6" apart and offset 2" from the center of the
camera.
Each of the five different images corresponds to an assembly program that is
specific to the
particular style of sidewall, and based on the image taken by camera 25, the
CPU selects the
proper program to both initially position and assemble the sidewall panel 2,
bottom rail 4, and
top rail 6.
[093] Once the initial position of the sidewall assembly and the correct
punching pattern
is determined, the punching and riveting processes commence. The sidewall
assembly travels
along center rail 40 by the indexing movements of drive motor 44 (Figure 2 and
3) and center
cart mechanism 14. Throughout the assembly process, vision system 24 continues
to take
photographs of the sidewall assembly after each indexing movement to ensure
that center cart
mechanism 14 moves the sidewall assembly the proper distance. If center cart
mechanism 14
21
CA 02583858 2007-04-04
indexes the sidewall assembly an incorrect distance, vision system 24 will
recognize the error
and determine the difference between the actual position and the proper
position, and the CPU
will adjust the indexing distance by 0.020" increments towards the correct
position.
Additionally, based upon the data collected by each photograph, the vision
system will determine
the proper riveting and punching processes that must occur for each indexed
position. In
particular, vision system 24 records the data captured at a particular
position, the CPU
determines the proper punching and riveting patterns for that position and the
information is
stored in an array file. As the sidewall assembly enters the punching and
riveting presses, the
PLCs controlling the presses recalls the information from the array to
determine the proper
punching and riveting sequence for each position along the length of the
sidewall assembly.
[094] Referring to Figures 24A -- 24F, during each indexing move performed by
center
cart mechanism 14, first cart 70 and second cart 72 move separately and at
different times. Prior
to the first indexing move, both first cart brake 50 and second cart brake 52
are activated, locking
both carts rigidly to guide flange 48a. Referring with particularity to Figure
24A, once the carts
are to index, second cart brake 52 disengages from center guide flange 48a,
and drive motor 44
rotates drive pulley 46 (Figure 3) causing the drive belt to pull second cart
72 towards machine
second end 30. First cart brake 50 remains engaged on center guide 48 (Figure
24A), and
pneumatic cylinder 94 allows cylinder piston rod 96 to extend as second cart
72 is pulled away
from first cart 70.
[095] Referring to Figure 24B, when the indexing of second cart 72 is
completed,
second cart brake 52 engages guide flange 48a, fixing second cart 72 rigidly
in place. First cart
brake 50 then disengages from guide flange 48a and pneumatic cylinder 94
actuates, pulling
piston rod 96, first cart 70, and the sidewall assembly towards second cart
72. When cylinder 94
retracts piston rod 96 far enough for shoulder bolt 95 to contact with shock
absorber 93, the
shock absorber will retard the motion of first cart 70 towards second cart 72.
At this point,
proximity switch 98 senses flag 100 attached to first cart 70 signaling to the
CPU to discontinue
the actuation of cylinder 94. As previously mentioned, proximity switch 98
operates to ensure
that the first cart does not over-travel and damage the second cart when
pulled by cylinder 94.
Once first cart 70 is indexed toward second cart 72, first cart brake 50 re-
engages guide flange
48a, locking first cart 70 and the sidewall assembly securely in place. After
each indexing step,
22
I u 14
CA 02583858 2007-04-04
the process repeats itself, advancing the center cart mechanism 14 and the
sidewall assembly
along the length of center rail 40 until the assembly process is complete.
[096] Referring to Figures 24C - 24F, upon the completion of the assembly
process,
second cart brake 52 disengages guide flange 48a, and the drive motor indexes
second cart 72
one final time, while first cart 70 is maintained in place by first cart brake
caliper 50. After
completion of the indexing move, second cart brake 52 re-engages guide flange
48a, locking
second cart 72 firmly in place along center rail 40. Referring with
particularity to Figure 24D,
jaws 76 open releasing the sidewall assembly, first cart brake 50 disengages
guide flange 48a,
and cylinder 94 actuates pulling first cart 70 towards second cart 72. In this
way, jaw
mechanism 74 is removed from engagement with the sidewall assembly.
[097] Referring to Figure 24E, when proximity sensor 98 senses flag 100,
cylinder 94
stops actuating, and pneumatic cylinder 84 actuates, pulling piston rod 80,
which is connected to
jaw assembly support member 78, down proximate to center rail 40 into a
position where jaw
assembly 74 is below the sidewall assembly. Jaws 76 close and second cart
brake 52 disengages
from guide flange 48a allowing drive motor 44 (Figure 3) to jog belt 42
(Figure 3) bringing
center cart mechanism 14 to its home position proximate to drive motor 44.
Referring now to
Figure 24Fõ when center cart mechanism 14 returns to its home position,
cylinder 84 actuates
raising piston rod 80, jaw assembly support member 78, and jaw assembly 74 up
distal from
center rail 40. Once jaw assembly 74 reaches its fully raised position, jaws
76 open, and center
cart mechanism 14 is ready to receive the assembly of a new sidewall.
[098] It should be understood that the punching process for both bottom rail
punching
press 16 and top rail punching press 18 is nearly identical. Accordingly, the
description of the
punching process provided herein is limited to the bottom rail. The only
difference between the
punching of the bottom rail and the punching of the top rail is the number of
holes punched
during the post hole punching steps.
[099] Referring back to Figure 1, during the assembly process, as center cart
mechanism
14 advances the sidewall assembly along the length of assembly machine 10, the
bottom rail
portion of the sidewall approaches the bottom rail punching press 16. Punching
press 16 is
equipped to punch two varieties of holes: field holes and post holes. Field
holes are equally
spaced and are punched in a single row along the entire length of the bottom
rail 4 parallel to
23
CA 02583858 2007-04-04
machine central longitudinal axis 26. Post holes are holes punched through the
sidewall
assembly at a post and are punched in a column of two holes transverse to
machine central
longitudinal axis 26. Each column of post holes is aligned with a field hole,
so that when the
field and post holes are punched, the result is a single column of three holes
with the field hole
being closest to the machine central longitudinal axis 26 and the two post
holes being further
away from axis 26.
[01001 Referring now to Figure 10, press 16 punches field holes when gag
cylinders 262a
and 262b force field gags 256a ad 256b into their respective gag slots 260
thereby restraining
field punches 254a and 254b from any vertical motion. In order to accommodate
the restrained
field hole punches 254a and 254b, bottom shoe gag cylinder bank 269 (Figure 9)
actuates gag
cylinders 282 and 283, which force gags 234 and 235, respectively, into gag
guides 232. As
gags 234 and 235 enter gag guides 232, gag leading edges 234a and 235a engage
the lower
portion of their respective rail punches 244 lifting the rail punch up and out
of bottom die block
216. Cylinders 282 and 283 are sized appropriately so that when fully extended
rail punches 244
rests on gal; first stage surfaces 234b and 235b. As a result, the combined
action of gag cylinders
262a and 262b (Figure 10) and gag cylinders 282 and 283 (Figure 9) punches
field holes when
punching cylinder 212 lowers top die assembly 218 (Figure 6 and 7) into its
punching position.
[01011 Referring now to Figure 10, punching press 16 punches post holes when
gag
cylinders 262c and 262d force post gags 258a and 258b, respectively, into
their respective gag
slots 260 thereby restraining post punches 254c and 254d from any vertical
motion. In order to
accommodate the restrained post hole punches 254c and 254d, bottom shoe gag
cylinder bank
269 (Figure 9) actuates gag cylinders 282 and 283, which force gags 234 and
235 into gag guides
232. As gags 234 and 235 enter gag guides 232, gag leading edges 234a and 235a
engage the
lower portion of their respective rail punches 244 lifting the rail punches up
and out of bottom
die block 216. The actuation of cylinders 282 and 283 forces gags 234 and 235
into gag guides
232 so that rail punches 244 rests on gag first stage surfaces 234b and 235b.
On the other hand,
when punching field holes, both cylinders 276 and 282 actuate to force gag 234
into gag guides
232 while both cylinders 277 and 283 actuate to force gag 235 into gag guides
232. In this way,
rail punches 244 rest on second stage surfaces 234c and 235c when punching
field holes.
24
x 1
CA 02583858 2007-04-04
[01021 Because gag cylinders 262a, 262b (Figure 10), 276, 277, 282 and 283
(Figure 9)
function independently, it should be understood that punching press 16 may
punch multiple
arrangements of holes. The following arrangements are possible:
a. gag cylinder 262a (Figure 10) actuates, restraining only field gag 256a,
while
gag cylinder 283 (Figure 9) actuates, and only one field hole is punched,
b. gag cylinder 262b (Figure 10) actuates, restraining only field gag 256b,
while
gag cylinder 282 (Figure 9) actuates, and only one field hole is punched,
c. both gag cylinders 262a and 262b (Figure 10) actuate, restraining field
punches 256a and 256b, while gag cylinders 282 and 283 (Figure 9) extend,
forcing both gags 234 and 235 into gag guides, and two field holes are
punched,
d. gag cylinders 262a and 262c (Figure 10) actuate, and both gag cylinders 277
and 283 (Figure 10) actuate, and one field hole and two post holes are
punched,
e. gag cylinders 262b and 262d {Figure 10) actuate, and both gag cylinders 276
and 282 (Figure 9) actuate, and on field hole and two post holes are punched,
or
f. any appropriate combination there of
It should be understood that depending upon the spacing of posts within the
sidewall assembly, it
may be appropriate for the gag cylinders to actuate so that only a field hole
is punched for each
rail punch 244. It may also occur that the gag cylinders actuate so that a
field hole is punched for
one rail punch while both a field hole and two post holes are punched for the
other rail punch.
Finally, the gags may actuate so that a field hole and two post holes are
punched for one rail
punch while no holes are punched for the other rail punch. In this way,
punching press 16 can
accommodate for a number of different sidewall assembly designs that call for
various field and
post hole arrangements.
[01031 Referring back to Figure 1, when punching a top rail, top rail punching
press 18
punches field holes in a manner similar to bottom rail punching press 16: a
single hole is
punched for each rail punch 344 (Figure 14), and each hole corresponds to die
buttons 346a
(Figure 14) located at a field position that is distal from gag cylinder bank
369 (Figure 14). On
the other hand, when punching post holes, one rail punch may engage to punch
one field hole
I N 114
CA 02583858 2007-04-04
and one post hole for a leading edge of the post while the other rail punch
does not engage at all,
or one rail punch may engage to punch one field hole and one post hole for a
trailing edge of the
post while the other rail punch engages to punch one field hole. For this
reason, each gag is
provided with a separate pair of cylinders in gag cylinder bank 369.
[0104] Referring back to Figure 7, prior to the punching process, two nozzles
207,
attached to the side of bottom rail punching press 16 facing the advancing
sidewall, spray a
lubricating agent onto the bottom rail to reduce friction and binding between
the punches and the
rail and to minimize wear on the tips of the punches. Once the sidewall passes
under the
lubricating nozzles, the sidewall assembly is indexed into the bottom rail
punching press 16.
Referring now to Figure 25A, as sidewall 2 and bottom rail 4 index into
punching area 208, rail
punches 244 remain in their normally lowered position, and die buttons 246 do
not contact the
underside of sidewall 2 or bottom rail 4. Referring to Figure 25B, cylinder
bank 269 remains in
its normal arrangement where none of gag cylinders 276, 277, 282 or 283
actuate to force gags
234 into gag spacer 2 3 2 .
[0105] Referring back to Figure 4B, once sidewall 2 and bottom rail 4 complete
the
indexing move into punching area 208 (Figure 25A), skate lifter 29 raises the
sidewall assembly
up, distal from machine frame 12. That is, lifting cylinder 31 actuates
pushing outer skate 32 up
while lifter guide posts 33 ensure that the skate remains properly aligned as
it rises. Referring to
Figures 26A and 26B, once the sidewall assembly has been raised, gag cylinders
282 and 283
bias gags 234 ad 235 into gag guides 232, and the respective angled leading
edges 234a and
235a slide under the bottom portion of rail punches 244 lifting the rail
punches onto first stage
surface 234b and 235b (Figure 25B). When resting on first stage surfaces 234b
and 235b, rail
punches 244 are positioned such that die buttons 246 are proximate to the
underside of sidewall 2
and bottom rail 4 in a position appropriate for punching field and/or post
holes.
[0106] Alternatively, if gag cylinders 276 and 277 also actuate, gags 234 and
235 will be
biased further into gag guides 232 and gag intermediate surfaces 234d and 235d
will push rail
punches 244 upwardly until the rail punches come to rest on gag second stage
surfaces 234c and
235c. In this position, rail punches 244 are positioned appropriately to only
punch field holes. It
should be understood that second stage surfaces 234c and 235c are raised 0.070
inches from its
respective first stage surface 234b and 235b. This 0.070 inch step
accommodates for variations
26
I I I A I Y I
CA 02583858 2007-04-04
in sidewall assembly thickness when punching through the sidewall panel and
the rail only, as
opposed to punching through the sidewall panel, the rail, and a post. Thus,
first stage surfaces
234b and 235b are used for punching holes through a bottom rail, a wall panel
and a sidewall
post, whereas second stage surfaces 234c and 235c are used for punching
through only a bottom
rail and a wall panel in between sidewall posts.
[0107] Referring to Figure 26B, gag cylinder bank 269 controls the sliding of
gags 234
and 235 into gag guide 232. Actuation of the lower gag cylinders 282 and 283
extends gags 234
and 235 into gag guides 232 so that rail punches 244 are in the post punching
position. Upper
gag cylinders 276 and 277 may then actuate and piston rods 284 and 285, which
are connected
respectively to gags 234 and 235, extend forcing gags 234 and 235 even further
into gag guides
232 positioning rail punches 244 to punch the wall assembly between posts.
[0108] Referring again to Figures 25A and 26A, gag proximity switches 214a,
214b and
214c sense the location of gags 234 and 235 to ensure that the gags are
properly positioned
during the punching process. In a preferred embodiment, front proximity switch
brackets 215a
each support front proximity switch 214a such that it will sense the gag
leading edges 234a and
235a when the gags are inserted into gag guides 232. Rear proximity switch
brackets 215b each
support intermediate proximity switch 214b and rear proximity switch 214c.
Intermediate
proximity switch 214b senses raised gag portions 234c and 235c, and rear
proximity switch 214c
sense a rear edge 234e and 235e (Figure 26B) of the respective gags.
[0109] When the gags are not inserted into gag guides 232, only rear proximity
switch
214c will sense the rear end of gag 234. When the gags are inserted into gag
guides 232 such
that rail punches 244 are resting on first stage surfaces 234b and 235b, front
proximity switches
214a will sense the leading edge 234a and 235a of the gags, rear proximity
switches 214c will
sense the rear end of the gags 234 and 235, and intermediate proximity
switches 214b will not
sense anything at all and. When the gags are fully inserted into gag guides
232 such that rail
punches 244 are resting on second stage surfaces 234c and 235c, front
proximity switches 214a
will sense gag leading edges 234a and 235a, intermediate proximity switch 214b
will sense gag
portions 234c and 235c, but rear proximity switches 214c will not sense the
gags because the
gags will be pushed to a position that is past the location of the rear
proximity switches.
27
a 11& ,
CA 02583858 2007-04-04
[0110] The CPU receives signals sent by the proximity switches, and based upon
which
proximity sensors are relaying information, the CPU can determine whether the
gags are in the
proper position to perform the punching process. For example, if the CPU only
receives
information from the rear proximity switches, the CPU will recognize that the
gags are in a fully
retracted position. Likewise, if the CPU receives information from the front
and back proximity
switches, the CPU will recognize that the gags are extended only half way into
the gag slots.
Finally, if the CPU receives information from only the front and intermediate
proximity sensors,
the CPU will recognize that the gags are fully extended into the gag slots.
[0111] Once gags 234 and 235 slide into gag guides 232 and rail punches 246
rise into a
punching position, skate lifter 29 (Figure 4B) lowers sidewall 2 and bottom
rail 4 so that they
rest on die buttons 246. Referring back to Figure 4B, skates 32 are lowered by
skate lifters 29,
which pull skates 32 downward and distal from the underside of sidewall panel
2, until sidewall
panel 2 rests entirely upon die buttons 246 (Figure 26A).
[0112] Referring to Figure 26A, once the sidewall assembly (not shown in
Figure 26A)
rests on die buttons 246, top die gag cylinders 262 (Figure 10) actuate,
driving the appropriate
gags into their respective top die gag slots 260. That is, when punching field
holes, only the gag
cylinders connected to field gags 256 actuate, and only the field gags slide
fully into their slots
262. This ensures that when the top die is lowered toward the sidewall during
punching, only the
field punches 254a (Figure 10) will punch through the bottom rail 4 and
sidewall panel 2
between posts. Post gags 258 are not driven into their slots, and,
accordingly, post punches 254b
(Figure 10) simply slide up through the counterbored through-holes 264 during
punching,
ensuring that only field holes are punched. When punching at a post, gag
cylinders 262 engage
both a field gag 256 and a post gag 258 on the same side of punch retainer 252
and drive them
into their respective gag slots 260. In this position, field gag proximity
switches 257a and post
gag proximity switches 257b (Figures 8 and 10) no longer sense the gags and
relay a signal to the
CPU indicating that the gags have been properly biased into the slots 260 for
punching.
[0113] As previously discussed, punch cylinder 212 (Figures 6 and 7) may be a
push type
cylinder actuated to push top die assembly 218 upward distal from bottom
punching die 216 or
downward into a punch stroke. Referring to Figures 10 and 27A - 27B, once the
gag cylinders
drive the appropriate punch gags into their respective slots 260, the CPU
sends a signal to the
28
I I I W IA
CA 02583858 2007-04-04
PLC to actuate cylinder 212 (Figure 8) into a punching stroke. Thus, piston
rod 213 and top die
assembly 21.8 is biased downward until lower punching proximity switch 223
(Figure 8) senses
top die shoe: 248. Top shoe bushings 250 slide along guide posts 228 ensuring
that top shoe 248
remains parallel to the sidewall during the punching process In a preferred
embodiment,
punching cylinder 212 is selected so that the stroke of piston rod 213 reaches
its fully extended
position to punch through both bottom rail 4, sidewall panel 2 and a post. As
a result, when
piston rod 213 is fully extended, die button center bores 245 (Figure 9)
slidably receive punch
tips 270, as shown in Figure 27B.
[0114] Once punching has occurred, lower punching proximity switch 223, which
is
positioned to sense when top die shoe 248 is lowered far enough to fully punch
through the
sidewall assembly, sends a signal to the CPU that the holes have been punched.
The CPU then
sends a signal to the PLC, and the PLC actuates punching cylinder 212 so as to
push piston rod
213 and top die assembly 218 upwards to its home position. When top die
assembly 218 reaches
its home position, upper punching proximity switch 222 senses top die shoe 248
and relays a
signal back to the CPU that the top die assembly 218 has reached its home
position, and the
sidewall assembly may be indexed to the next punching position. Often punches
254 will bind in
the punched holes pulling the sidewall assembly up and off of the lower die.
To prevent the
sidewall from binding with the punches, a separating mat 220 is provided at
the bottom rail
punch press upper portion 202 to separate the sidewall assembly from the
punches as top die
shoe 248 is lifted upwards away from rail punches 244.
[0115] Figures 27C and 27D show the gag assembly of Figure 27B in another
position.
[0116] After the holes have been punched in the sidewall assembly and punching
cylinder piston rod 213 has raised top die shoe 248 and top die assembly 218,
skate lifter
cylinder 31 raises skate 32 (Figure 4B) lifting the sidewall assembly off of
rail punches 244.
Gag cylinder bank 269 pulls the gags 234 and 235 out of their gag guides 232
lowering rail
punches 244 to their lowered position (Figure 25B). After rail punches 244
return to their
lowered positions, skate lifter cylinder 31 pulls skate 32 down proximate to
machine frame 12
(Figure 4B) returning sidewall assembly to a position where it may be indexed
by center cart
mechanism 14 (Figure 2). The center cart mechanism indexes the sidewall once
again, the vision
system takes another picture to confirm the position of the side wall assembly
relative to the
29
A
CA 02583858 2007-04-04
punching presses, and the punching process repeats itself until holes have
been punched along
the entire length of the bottom rail. As previously mentioned, the same
process is
simultaneously followed for the top rail.
[0117] Once the newly punched holes in both the bottom and top rails pass
through their
respective punching presses, operators wipe bottom and top rails 4 and 6 with
a rag to remove
excess lubricant from the rails, and rivet blanks are inserted into the
punched holes. The eight-
foot spacing between the punching presses and the riveting presses gives the
operators ample
time and work space to clean the rails and insert the rivets before the
riveting presses engage the
rivet blanks.
[0118] Referring to Figures 19, 28A and 28B, as the sidewall assembly enters
the
riveting area 408 of riveting press 20b, gag cylinder bank 469 (Figures 16,
17, and 20) actuates
in exactly the same manner as described above in connection with bottom rail
punching press 16.
Once the sidewall assembly completes the indexing move into riveting area 408
(Figures 28A
and 28B), skate lifter 29 raises the sidewall assembly up distal from machine
frame 12. Lifting
cylinder 31 actuates, pushing outer skate 32 up while lifter guide posts 33
ensure that the skate
remains properly aligned as it rises (Figure 4B).
[0119] Referring with particularity to Figure 19, once the sidewall assembly
has been
raised, gag cylinders 476 and 477 and/or 482 and 483 bias gags 434 and 435
into gag guides 432.
If both post and field rivets are to be mashed, then only gag cylinders 476
and 477 actuate
causing the respective angled leading edges 434a and 435a to slide under the
bottom portion of
rail anvils 436 lifting the rail anvils onto gag first stage surfaces 434b and
435b. IF on the other
hand only field rivets are to be mashed, then all four gag cylinders 476, 477,
482 and 483 actuate
causing the respective transition portions 434d and 435d to slide under the
bottom portion of rail
anvils 436 lifting the anvils onto gag second stage surfaces 434c and 434d.
When resting on
either the gag first or second stage surfaces, rail anvils 436 are positioned
such that plungers 438
are proximate to the underside of sidewall 2 and bottom rail 4. It should be
understood that the
gag second stage surfaces are raised 0.070 inches from the gag first stage
surface to
accommodate for the variances in the wall thickness between a post position
and a field position.
That is, when mashing rivets at sidewall posts, the sidewall assembly is
thicker than when only
mashing field rivets in between posts.
I W IA CA 02583858 2007-04-04
[0120] Referring now to Figure 28A, gag proximity switches 414a, 414b and 414c
sense
the location of gags 434 and 435 to ensure that the gags are properly
positioned during the
riveting process. In one embodiment, front proximity switch brackets 415a each
support front
proximity switch 414a such that it will sense the sloped leading edges 434a
and 435a of the gags
when the gags are inserted into gag guides 432. Rear proximity switch brackets
415b each
support intermediate proximity switch 414b and rear proximity switch 414c
(Figure 28A).
Intermediate proximity switch 414b senses the raised gag portions 434c and
435c (Figure 19),
and rear proximity switch 414c sense the gag rear ends 434e and 435e (Figure
19).
[0121] When the gags are not inserted into gag guides 432, only rear proximity
switch
414c will sense the body of gags 434 and 435. When the gags are inserted into
gag guides 432
such that rail punch 444 is resting on the first stage surfaces, front
proximity switch 414a will
sense the respective leading edges 434a and 435a of the gags, proximity
switches 414c will sense
the rear end of gags 434 and 435, and intermediate proximity switches 414b
will not sense
anything at all. When the gags are fully inserted into gag guides 432 such
that rail punch 444 are
resting on second stage surfaces 434c and 435c, the front proximity switches
will sense the
leading edge of the gags, intermediate proximity switches 414b will sense the
raised gag portions
434c and 435c, but rear proximity switches 414c will not sense the gags at all
because gag rear
end portions 434e and 435e will he pushed to a position that is past the
location of the rear
proximity switch. The CPU receives the signals sent by the proximity switches,
and based upon
which proximity sensors are relaying information the CPU can determine whether
the gags are in
the proper position to perform the mashing process. For example, if the CPU
only receives
information from the rear proximity switches, the CPU will recognize that the
gags are in a fully
retracted position. Likewise, if the CPU receives information from the front
and back proximity
switches, the CPU will recognize that the gags are extended only half-way into
the gag slots.
Finally, if the CPU receives information from only the front and intermediate
proximity sensors,
the CPU will recognize that the gags are fully extended into the gag slots.
[01221 Referring back to Figure 4B, as with the punching presses, skates 32
that support
the sidewallL assembly in the vicinity of riveting press 20b, are lowered by
skate lifter cylinder 31
until the sidewall assembly rests entirely on plungers 438 (Figure 28A).
Referring to Figure
28C, plungers 438 extend far enough beyond the rail anvil top surface 433 that
the shank end of
the rivets blanks (not shown), which extend below the bottom surface of
sidewall 2 and rails 4 or
31
w
CA 02583858 2007-04-04
6, do not make contact with the top surface of rail anvils 436. Springs 439
(Figure 28C) are stiff
enough to maintain plungers 438 in the upward position so that when the
sidewall assembly rests
atop the plungers, springs 439 do not compress and allow the rail anvils to
push the rivets (not
shown) out through the top of their respective holes.
[0123] Referring now to Figures 16 - 18A, once sidewall 2 rests exclusively on
plungers
438, the CPU sends a signal to the PLC, which then actuates cylinder 412
(Figures 16 and 17),
driving piston rod 413 (Figure 18A) and top die assembly 418 down until lower
punching
proximity switch 423 (Figures 16 and 17) senses top die shoe 440. Top shoe
bushings 442 slide
along guide posts 428 ensuring that top die shoe 440 remains parallel to the
sidewall as it is
lowered during the riveting process. Lower riveting proximity switch 423 is
positioned such that
it senses the location of top die shoe 440 only when the top die shoe has been
lowered far enough
for anvils 446 to engage and compress the rivet blanks (not shown).
[0124] As the top die shoe lowers to its rivet compressing position, anvils
446 push the
flanges of the rivet blanks (not shown) and urge them downward. Plungers 438,
as previously
described, are spring loaded and engage the sidewall assembly between rivet
blanks. As the top
die shoe lowers, plungers 438 engage the underside of the sidewall assembly
and press the
assembly parts together to ensure that the parts are properly aligned and no
gaps exist between
the parts when the rivet blanks are compressed. The downward pressure exerted
on the rivets by
anvils 446 eventually overcomes the resilient spring-force of springs 438
(Figure 28C) and
forces plungers 438 down until the shank end of the rivets (not shown)
contacts rail anvil top
surface 433 (Figure 28C). The downward force on riveting anvils 446, anvil
spacer 444, and top
die shoe 440 compresses the rivet shanks against rail anvils 436 causing the
rivet shanks to
spread along the bottom of sidewall 2 and rails 4 or 6 securely fastening the
three components
together. As previously mentioned, lower riveting proximity switch 423 senses
top die shoe 440
when riveting cylinder piston rod 413 has fully extended allowing riveting
anvils and rail anvils
to properly compress the rivets. When lower proximity switch 423 senses top
die shoe 440, a
signal is sent to the CPU that actuates riveting cylinder 412 lifting top die
shoe 440 until it
reaches its home position.
[0125] After top die shoe 440 returns to its home position, skate riser
cylinder 31 actuates
lifting skate 32 (Figure 4B), thereby lifting the sidewall assembly off of
rail anvil plungers 438.
32
I I 1014,
CA 02583858 2007-04-04
Gag cylinder bank 469 (Figures 16, 17 and 20) retracts bottom die gags 434 and
435 from gag
guides 432 lowering rail anvils 436. Once rail anvils 436 are lowered, skate
riser cylinder
actuates lowering the skate and sidewall assembly back onto frame 12 so that
the wall can be
indexed once again. After the sidewall assembly has been riveted together
along the entire
length of the sidewall assembly, operators remove the fully assembled
sidewall, and a new,
unassembled sidewall may be loaded on the machine 10 for assembly.
[0126] While one or more preferred embodiments of the invention have been
described
above, it should be understood that any and all equivalent realizations of the
present invention
are included within the scope and spirit thereof. The embodiments depicted are
presented by
way of example and are not intended as limitations upon the present invention.
Thus, those of
ordinary skill in this art should understand that the present invention is not
limited to the
embodiments disclosed herein since modifications can be made.
33